Windows 10 Diagnose Crash and Restart Without Blue Screen
How to Diagnose BSODs (Blue Screen)
Introduction:
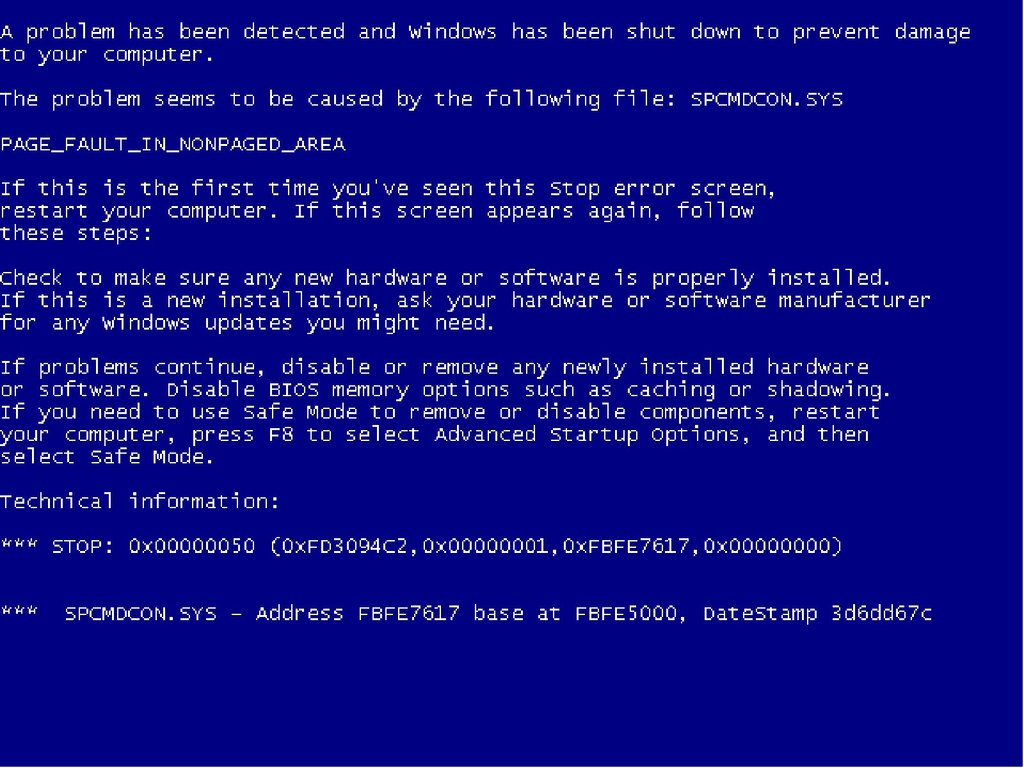
BSODs appear when Microsoft Windows encounters a critical error it can't recover from, requiring a reboot and possibly resulting in lost work. A BSOD is the result of low-level software crashing — or faulty hardware. BSODs are rarely caused by Windows itself unless the operating system files were tampered and altered by malware. Some malware can even purposely cause BSODs. Blue screens are thus usually caused by hardware problems and / or issues with low-level software running in the Windows kernel possibly because of drivers. A blue screen occurs when Windows encounters a "STOP Error." This critical failure causes Windows to crash and stop working. When a blue screen occurs, Windows automatically creates a minidump file that contains information about the crash and saves it to your disk.
If you are encountering BSODs and are asking for help in the troubleshooting sub forum here in LTT, there are some things we need you to do to help us help you!
First, we need the dump files produced by Windows at the time of the blue screen. The dump files contain information about what possibly caused the BSOD and also contains debugging information.
To obtain these file(s) follow the procedure below:
First, begin by listing the following information:
· OS - Windows 8.1, 8, 7, Vista ?· x86 (32-bit) or x64 ?· What OS was originaly installed on the system?· Is the OS an OEM version (came pre-installed on system) or full retail version (YOU purchased it from a retailer)?· Age of system (hardware)· Age of OS installation - have you re-installed the OS?· CPU model· Video Card model· MotherBoard - (if NOT a laptop)· Power Supply - brand & wattage (if laptop, skip this)· System Manufacturer · Exact model number (if OEM or laptop)· Laptop or Desktop?
Next, choose your preferred method below:
The following "tool" (Sysnative BSOD Dump + System File Collection App) is not my own, nor does it have any association with LTT or the LTT STAFF. Therefore it has to marked as an UNOFFICIAL LTT app.
Method A has been adapted by myself (@ionbasa) from the Sysnative forum thread here: http://www.sysnative.com/forums/bsod-crashes-kernel-debugging/68-blue-screen-of-death-bsod-posting-instructions-windows-10-8-1-8-7-vista.html
The tool is working property of Sysnative and its authors:
jcgriff2 - J. C. Griffith, Microsoft MVP
TheOutcaste - Jerry Wines
Patrick - Patrick Barker, Microsoft MVP
niemiro - Richard
Tekno Venus - Stephen
© http://www.sysnative.com/
© sysnative.com - MVP
© 2008 - 2014 sysnative.com
New Jersey, USA; Oregon, USA; New York, USA
ALL RIGHTS RESERVEDIf you have any objections to using the aforementioned app, there are instructions below on how to alternatively grab the needed files manually.
- Download the Sysnative BSOD Dump + System File Collection App here: http://www.sysnative.com/apps/SysnativeBSODCollectionApp.exe
- Run the app - Double-click on the downloaded application file. Give the application ample time to collect the necessary files and system information, this may take up to 10-15 minutes, please be patient! Here is a screenshot showing the utility in action:
-

- Once the tool finishes, bring up an elevated administrative CMD prompt:
- Windows 7 & Vista - START | type cmd.exe into the start search box | right-click on cmd.exe | select "Run as Administrator"
- Windows 8.1 & 8 - Press WIN +X keys | select "Command Prompt (Admin)"
- Run the following command:
perfmon /report- This should bring up the Resource and Performance Monitor, as follows:
-

- Once PERFMON has finished collecting data for 60 seconds, save the output by selecting: File | Save As | Save as: (Report Files) HTML
- Zip up the PERFMON output; create a new thread HERE.
- Unfortunately, the forum currently forbids that .zip files be uploaded to your post. Therefore an alternate method has to be used to share your two zip files. You will have to use an online file service such as: Dropbox, Mega, OneDrive, Google Drive, etc. to share your two zip files. In your post, include a link to the two zip files.
NOTE:
The app auto-zips the SysnativeFileCollectionApp output folder. It is located in your Documents folder. Windows Explorer should open and highlight the zipped folder.
Please do not modify the output files!INFO:
The Sysnative BSOD Dump + System File Collection App does not get installed (it is a stand-alone EXE) nor does it make any changes to the registry. It only creates the SysnativeFileCollectionApp output folder + a zipped version - both located in Documents folder. You can delete them at any time, but we suggest that you wait until our work together is completed before doing so.
This Method involves manually copying the dump files.
- Start by opening Explorer
- In the address bar at the top, enter the following folder structure: "%SystemRoot%\Minidump\".
- You should see one or more dump files. If there are none, or the folder cannot be found, then a dump file was not created when Windows blue screened.
- Select all the dump files and copy them.
- Create a new zip folder on the Desktop and paste the dump files in the zipped folder.
- NOTE: You cannot move the files nor can you use the context menu to "send to zip' or 'send to desktop'! The files have to be manually coppied over.
- Next, bring up an elevated administrative CMD prompt:
- Windows 7 & Vista - START | type cmd.exe into the start search box | right-click on cmd.exe | select "Run as Administrator"
- Windows 8.1 & 8 - Press WIN +X keys | select "Command Prompt (Admin)"
- Run the following command:
perfmon /report- This should bring up the Resource and Performance Monitor, as follows:
-
- Once PERFMON has finished collecting data for 60 seconds, save the output by selecting: File | Save As | Save as: (Report Files) HTML
- Zip up the PERFMON output; create a new thread HERE.
- Unfortunately, the forum currently forbids that .zip files be uploaded to your post. Therefore an alternate method has to be used to share your two zip files. You will have to use an online file service such as: Dropbox, Mega, OneDrive, Google Drive, etc. to share your two zip files. In your post, include a link to the two zip files.
There are 4 types of dump file: A Small Memory Dump, a Kernel Memory Dump, a Complete Memory Dump, and a Automatic Memory Dump (Windows 8+).
- A Small Memory Dump has the following properties:
- The Stop message, its parameters and other data
- A list of loaded drivers
- The processor context (PRCB) for the processor that stopped
- The process information and kernel context (EPROCESS) for the process that stopped
- The process information and kernel context (ETHREAD) for the thread that stopped
- The Kernel-mode call stack for the thread that stopped
- A Small Memory Dump is exactly 64 KB in size, and requires only 64 KB of pagefile space on the boot drive. This kind of dump file can be useful when space is greatly limited. However, due to the limited amount of information included, errors that were not directly caused by the thread executing at time of crash may not be discovered.
- The bug check message and parameters, as well as other blue-screen data.
- The processor context (PRCB) for the processor that crashed.
- The process information and kernel context (EPROCESS) for the process that crashed.
- The thread information and kernel context (ETHREAD) for the thread that crashed.
- The kernel-mode call stack for the thread that crashed. If this is longer than 16 KB, only the topmost 16 KB will be included.
- A list of loaded drivers.
- A list of loaded modules and unloaded modules.
- The debugger data block. This contains basic debugging information about the system.
- Any additional memory pages that Windows identifies as being useful in debugging failures. This includes the data pages that the registers were pointing to when the crash occurred, and other pages specifically requested by the faulting component.
- The Windows SKU -- for example, "Professional" or "Server".
- A Kernel Memory Dump contains all the memory in use by the kernel at the time of the crash. This dump file will not include: unallocated memory, or any memory allocated to user-mode applications. For most purposes, this crash dump is the most useful. It is significantly smaller than the Complete Memory Dump, but it only omits those portions of memory that are unlikely to have been involved in the crash.
- A Complete Memory Dump is the largest kernel-mode dump file. This file includes all of the physical memory that is used by Windows. A complete memory dump does not, by default, include physical memory that is used by the platform firmware. This dump file requires a pagefile on your boot drive that is at least as large as your system memory; it should be able to hold a file whose size equals your entire RAM plus 1 Mb.
- Note: If a second bug check occurs and another Complete Memory Dump (or Kernel Memory Dump) is created, the previous file will be overwritten.
- An Automatic Memory Dump contains the same information as a Kernel Memory Dump. The difference between the two is not in the dump file itself, but in the way that Windows sets the size of the system paging file.The Automatic Memory Dump file is written to "%SystemRoot%\Memory.dmp" by default. The Automatic Memory Dump is available in Windows 8 and later.
Small Memory Dump files are written in the directory "%SystemRoot%\Minidump\". The dump file should have a similar syntax to: "mini022900-01.dmp". Any additional minidump files created will be given a unique name, which contains the date of the crash in the file name. The previous file will be preserved.
The Kernel Memory Dump file is written to "%SystemRoot%\Memory.dmp" by default. If a second bug check occurs and another Kernel Memory Dump (or Complete Memory Dump) is created, the previous file will be overwritten.
The Complete Memory Dump file is written to "%SystemRoot%\Memory.dmp" by default. If a second bug check occurs and another Complete Memory Dump (or Kernel Memory Dump) is created, the previous file will be overwritten.
The Automatic Memory Dump file is written to "%SystemRoot%\Memory.dmp" by default. If a second bug check occurs and another Automatic Memory Dump is created, the previous file will be overwritten.
To configure the type of dump file to be created on a BSOD:
- Press the "Win" and the "R" keys at the same time - then type in "sysdm.cpl" (without the quotes) and press Enter
- Click the Advanced tab, and then click Settings under "Startup and Recovery"
-
- Optionally, you may want that "Automatically restart" is unchecked
-

- Then continue below:
- Under the Write Debugging Information header choose: "Small memory dump (### kB)"
- Ensure that the Small Dump Directory is listed as "%systemroot%\Minidump" (without the quotes)
- Click OK twice to exit the dialog boxes, then reboot for the changes to take effect
- Under the Write Debugging Information header choose: "Kernel memory dump"
- Ensure that the Dump Directory is listed as "%systemroot%\Memory.dmp" (without the quotes)
- Click OK twice to exit the dialog boxes, then reboot for the changes to take effect
- Under the Write Debugging Information header choose: "Kernel memory dump"
- Ensure that the Dump Directory is listed as "%systemroot%\Memory.dmp" (without the quotes)
- Click OK twice to exit the dialog boxes, then reboot for the changes to take effect
- Under the Write Debugging Information header choose: "Automatic memory dump".
- Ensure that the Dump Directory is listed as "%systemroot%\Memory.dmp" (without the quotes).
- Click OK twice to exit the dialog boxes, then reboot for the changes to take effect.
- Start by downloading the Windows SDK from: http://msdn.microsoft.com/en-US/windows/desktop/bg162891
- Accept the default install directory, unless you want to install to another drive or directory.
-
- During the install, select the Debugging Tools for Windows box and clear all the other boxes.
-

- Once installed run the following command in an Elevated Command Prompt to associate files to the Windows Debugger. For 64 bit systems:
"C:\Program Files (x86)\Windows Kits\8.1\Debuggers\x86\windbg.exe" -IANote: "-IA" is case sensitive.
-

- Create a folder on the root of your "C:\" drive, or another drive.
- Start Windbg, you can find it in the start menu under: All Programs > Windows Kits > Debugging Tools for x64 > WinDBG (x64). The go to File > Symbol file path, and copy/paste:
SRV*c:\symbols*http://msdl.microsoft.com/download/symbolsand then click ok. Note: Replace "c:\symbols" with the path of the directory you created earlier.
-

- Save your setting by clicking: File > Save Workspace
- Exit. Now all dump files will be associated with the Windows Debugger. Just double click a dump file to open it in WinDbg.
After opening a dump file your screen should look similar:

- If a driver or program is the cause of the BSODs, it will usually show up in the Probably Caused By line.
- You can research offending drivers here: http://sysnative.com/drivers/
- To get a list of running drivers when the BSOD happened, execute the following in WinBbg:
lmntsm- To display the Stop error code, aka bug check code, and its parameters, execute the following in WinBbg:
!analyze -show- To display a verbose output, execute the following in WinBbg:
!analyze -vPROCESS_NAME shows which process was running at the time of the crash, but not enough to jump to conclusions. FAILURE_BUCKET_ID and BUCKET ID can sometimes reveal culprit drivers that are not blamed in the Probably Caused By line.- To find out information about the motherboard and OEM, execute the following in WinBbg:
!sysinfo machineid- To see all available comands for reserching system information, run the following in WinDbg:
!sysinfoThe rest is usually taking the output from the aforementioned commands and just using logic and Google. You'd be amazed at what you can find out could be the culprit to the BSODs.
Also use http://www.carrona.org/bsodindx.html as a reference on what usually causes BSODs and what each STOP code means.
- Open WinDbg and go to Help and then Contents.
-

- Expand Debugger Reference, and then expand the Debugger Commands.
-
- Expand General Extension Commands and Kernel-Mode Extension Commands, and then click which command/extension you would like to view for detailed information about that extension/command.
-
- If a Windows/system driver is blamed, it's most likely not the real problem. Maybe if 'tcpip.sys' is blamed, perhaps the network adapter drivers are at fault?
- If 'Verifier_Enabled' dumps continue to point to system drivers, unstable hardware is likely the culprit. The most common cause is due to RAM and CPU overclocking, followed by: motherboard, PSU, video card, and storage drives can cause issues if memory is not being properly allocated, or unstable drivers are used.
- If your computer cannot boot normally you may be able to get the files by booting into safe mode.
- If you are overclocking (pushing the components beyond their design) you should revert to default at least until the crashing is solved.

Relevant Videos:
This video in specific can show you how to use the event log in general to diagnose a BSOD. Wendel also lightly touches on WinDbg, and how to quickly check a dump file. While this video doesn't cover everything on the event log, it does help novices get started into debugging.
http://carrona.org/
http://support.microsoft.com/kb/254649
http://support.microsoft.com/kb/315263
http://support.kaspersky.com/1771
Add 3rd party BSOD analysis tools
Using the Event Viewer to debug problems
Scanning for malware
Purposefully cause a BSOD to be used in debugging
Using Driver verifier to capture at fault 3rd party drivers
Add video tutorials
Add advanced commands to be used in WinDbgPlease leave any comments and feedback on what you would want to see.


Source: https://linustechtips.com/topic/96083-how-to-diagnose-bsods-blue-screen/
0 Response to "Windows 10 Diagnose Crash and Restart Without Blue Screen"
Postar um comentário